How to create artwork step by step
'Fold Over' Bleed = 'Material Over Size'
- The hem is folded over and sewn.
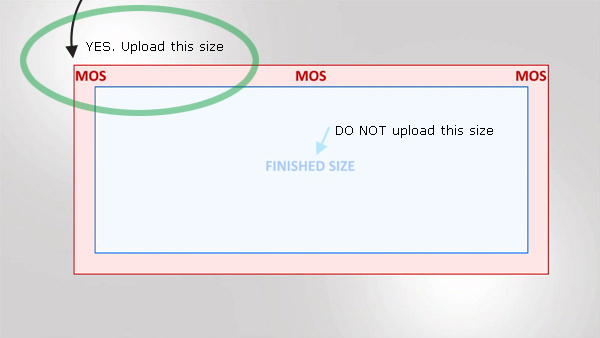
- This fold over bleed is called Material Over Size (MOS).
- Material must be added to your finished order size.
- - - - - - - - - - - - - - - - - - - - - - - - - - - - - - - - -
YOU MUST ADD Extra Measurement TO YOUR FILE DIMENSION.
This is now the new size of your upload design file.
- - - - - - - - - - - - - - - - - - - - - - - - - - - - - - - - - - Include the MOS (fold over bleed) around your design and save as this new dimension.
- Only files with correctly set fold over bleed will pass automatic manufacturing.
- Then: Refer to your file as being Banner Print Ready.
What is the correct size with fold over bleed? - Inches
All CUSTOM orders with Hems or Pole Pocket(s) and other(s) MUST have fold over bleed.
Your Fold Over Bleed is different. Use the Easy Template Maker
Some bleed sizes are: 1" hem. The hem is called Material Over Size (fold over bleed) that the factory cuts and folds over.
Example: 216"x72" outdoor banner sign requires a 1"+216"+1 so that the edges are folded AND 1"+72"+1"
The potential filesize = 80mb
Example File Dimension: 1"+216"+1"=218" x 1"+72"+1"=74" Material Over Size (bleed)
To check if your file has suitable 'bleed' Material Over Size, Use the Easy Template Maker to compare dimensions.
What is the correct size with fold over bleed? - Millimetres
All CUSTOM orders with Hems or Pole Pocket(s) and other(s) MUST have fold over bleed.
Your Fold Over Bleed is different. Use the Easy Template Maker
Some bleed sizes are: 25mm hem. The hem is called Material Over Size (fold over bleed) that the factory cuts and folds over.
Example: 8500"x1800" outdoor banner sign requires a 25mm+8500mm+25mm so that the edges are folded AND 25mm+1800mm"+25mm"
The potential filesize = 140mb
Example File Dimension: 25+8500+25=8550mm x 25+1800+25=1850mm Material Over Size (bleed)
To check if your file has suitable 'bleed' Material Over Size, Use the Easy Template Maker to compare dimensions.
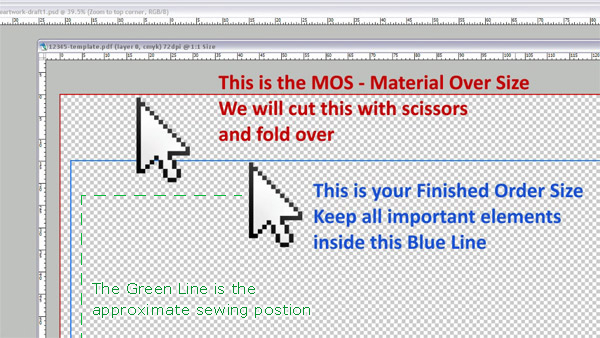
The Red Line is your MOS, the Blue Line is your finished order size
- Keep all important elements inside the Blue Line
- Material Over Size will be cut with scissors and folded over
- The Green Line is the approximate sewing position and threading.
Hems, Pole Pockets - Sleeves
Hems, Pole Pockets and Sleeves can all have graphic printing, but these will be folded over. The distance between the Red Line and Blue Line [ABOVE] is your hem. Hems may vary in size if a: Pole Pocket size, b: Fitting size or other. Keep in mind that hems can be graphic printing, but they will be folded over.
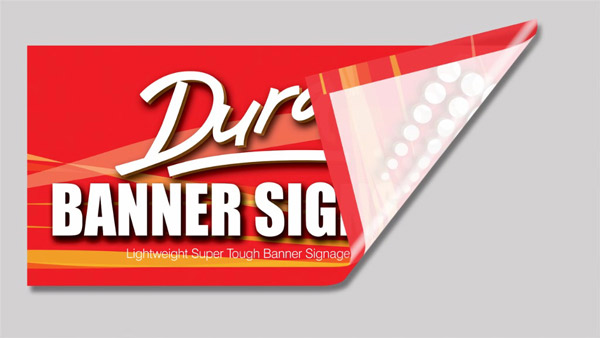
Keep all important elements inside a safe area to allow for sewing.
Frequently Asked Questions
Common Material Over Size questions are:
Q. Do you use Bleed? No, Bleed is a paper term that is trimmed away. We use Material Over Size. It is not removed and is folded to create a hem.
Q. Is Material Over Size the same as 'bleed'? NO, bleed is trimmed away. Material Over Size is folded. You must provide a file that can be folded over the edges.
Q. Can I have graphic printing on the fold? Yes. Keep in mind that hems and pole pockets can all have graphic printing but they will be folded over.
Q. If my banner is 3' high, do I provide a file that is 3' high or 3'2"? Yes please UPLOAD 3'2" ✔
Please do not use bleed, trim marks or any identifiers around your design anywhere. You can have graphic printing on the HEM, POLE POCKETS etc but these will be folded over.
Arranging Your File
Do not put Crop Marks, Trim Lines, Color Bars or any other information around you MOS
We do not use bleed or trim like traditional paper products
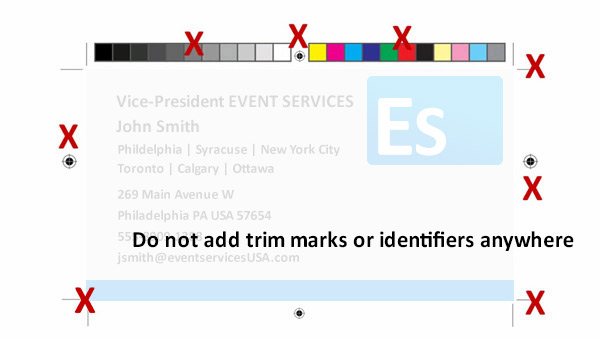
Do not add any Cutting Marks, Further Instructions, Color Bars or any other information outside the Red Line
Do not add any Cutting Marks, Further Instructions, Color Bars or any other information inside the Red Line
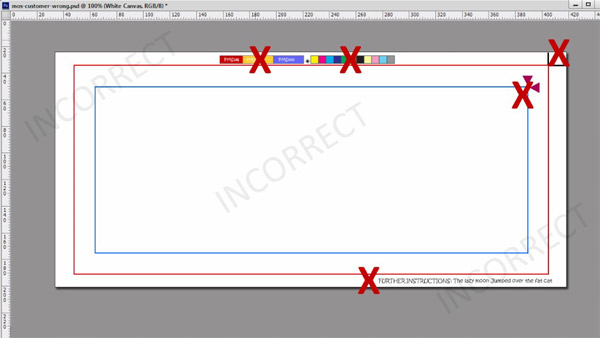
Do not extend the canvas size in any way. Extending the canvas size will alter your order, not match the order size and may print/cut disproportionally.
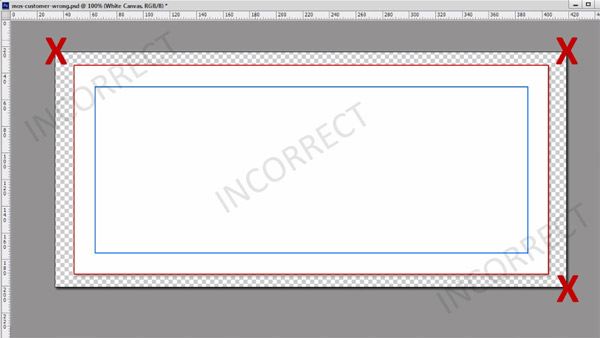
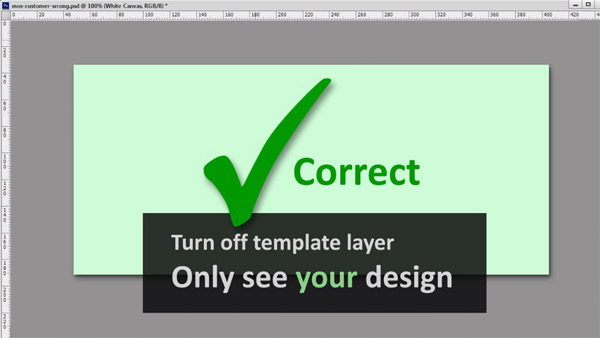
Crop your canvas size to the correct MOS size as recommended. Turn off your Easy Template Layer so that you only see your design.
Frequently Asked Questions
Common Arranging Your File questions are:
Why dont you use trims and rego's These are superseded and irrelevant with digital printing banner signs. All orders are automatically placed and cut to MOS size. Digital printing does not require bleed. All hems are folded.
Do I put cutting marks on the corners? NO. All our cutting is automatic. Any marks are disregarded and may adversely affect your design.
Can I give you my 'litho, offset or flexo' files? No. We do not use film, separations or other. Digital sign printing is direct to substrate micro dot.
My other printer wants me to add cutting marks"? We do not. We cut 1mm inside the MOS Red Line. This is our boundary. Any marks you put inside or outside the file will be incorrect and may affect the proportion of your finished order, the look of your print or be disregarded.
Flatten
Rasterize fonts and curves and flatten your design layers to resolve any vector information
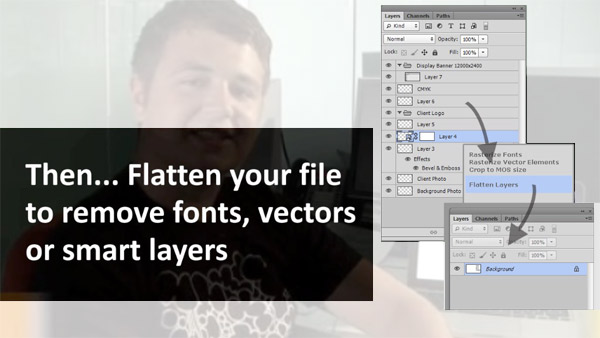
Remember, if you supply outlines, fonts or smart layers, they may print outside your design. To ensure your design integrity remains absolute. Flatten and Save As a CMYK pdf.
Designers NOTE If you are unsure how to proceed with this last step, please contact Let Us Design Department
Frequently Asked Questions
Common Flattening Your File questions are:
Q. How Do I Flatten? Using your favorite graphics programs such as Photoshop > Choose Layer > Flatten Image. Alternatively Working in layer view, you can also select a layer and 'Merge All or Flatten Image'
Q. What does Flattening do?This makes everything a pixel. Pixels are not strokes, outlines or fonts. Once you flatten your file each little color dot is apparent.
Q. I don't have Photoshop or a designer program that can flatten or rasterize. Please use the Let Us Design Department form and we will do it for you.


 Do you need custom size? Use the Calculator here

 Start with a